
Knowledge Base
Viewing Existing Jobs
Last updated on May 18th, 2026
Job List Page
Whether you’re working on leads or jobs, how they are viewed is much the same for both. The leads list/the customer job list allows users to view all the existing customer jobs in the system and perform actions related to those jobs. The pages also allow you to make any changes to existing jobs as required.
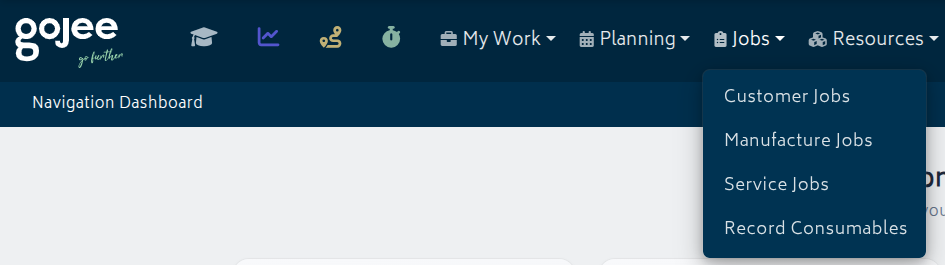
To view all customer jobs in the system, there are a couple of methods. For leads, go to Sales > Leads from the menu bar. For customer jobs, go to Jobs > Customer Jobs from the menu bar, or select Jobs & Projects from the Navigation Dashboard and click “See Customer Jobs”. You will be presented with the job list page:

There are 2 modes of view for this page – list mode and kanban mode. You can switch between list view and kanban view using the view toggle.
Kanban view groups jobs into workflow stages so users can visually manage operational progress. The page supports drag and drop – allowing you to quickly move your jobs through whatever workflows you’ve configured in Organisation Settings. This is especially useful to see all active jobs by stage and manage operational flow at a glance.
Each kanban column represents a workflow stage for Customer Jobs, and each card represents either a lead or an approved job. Jobs that have not yet been placed into a workflow stage will appear in the Unassigned column – this column will go away if there are no unassigned jobs. When hovering over a card, two icons will appear in the top right – one will open the job in the current tab and the other will open the job in a new tab.
If no workflow stages have been configured yet, set them up in Organisation Settings > Workflows before using the board.
List view is still usually better when you want to scan many rows with dense columns or compare fields across many jobs quickly. The best view depends on how your team works. Many teams will switch between both depending on what is the best view for the task at hand.
Stage changes can be made both on the kanban board and on the job page itself. On a lead or customer job, the breadcrumb and job actions area will show the assigned workflow stages for that job. This allows users to see all stages in the job’s workflow, identify the current stage and how much time the job has spent in its current stage, and progress the job through the stages.
If a job is assigned to more than one workflow, each workflow is shown separately.
Options and Filters
There are a number of different elements in the option bar that will allow you to filter and perform actions on the jobs.

Job Status Selector: By default, the system shows “All Open” jobs. Open jobs refers to any jobs which are in draft, quote, or approved status. You can choose which jobs you want to see, including rejected or completed jobs. Refer to Job Actions for more information on completing jobs.

Search Bar: The search bar allows users to search for a job based on any of the following fields:
- Job Reference Number
- Customer’s Name
- Job Title
- Customer’s Purchase Order (PO) number

Tag Fields: You can enter tags to filter jobs by custom requirements. If multiple tags exist, they can be filtered in “Any” mode or “All” mode – whether any of the tags will trigger the filter, or whether it needs to be a combination. Tags given to jobs will be displayed next to the job reference number on the list if any exist for a given job. Refer to Tags for more information.

Add job button: You can click the “Add” button to create a new customer job or a new lead. Refer to Creating a Job for more information.

Refresh button: If multiple users are using Gojee at once, jobs may be updated in the background. This will get the latest data for the jobs.

Import Jobs button: This button allows you to import multiple jobs at once via CSV. The following are required for import:
- Invoice type (do & charge, fixed price)
- Customer Name
- Items to be used on the job
This is useful if you are migrating existing jobs from another system or you would like to create jobs in bulk. You may only import customer jobs this way, not leads. Please see Importing Job Data for more details.
Table Options: Clicking this opens up the Table Options menu shown below. With the table options, you can do the following:
- Filter by job type
- Filter by invoice and purchasing status
- Filter by sales person responsible for the job
- Display and remove columns
When you open up the Table Options, these options will appear.
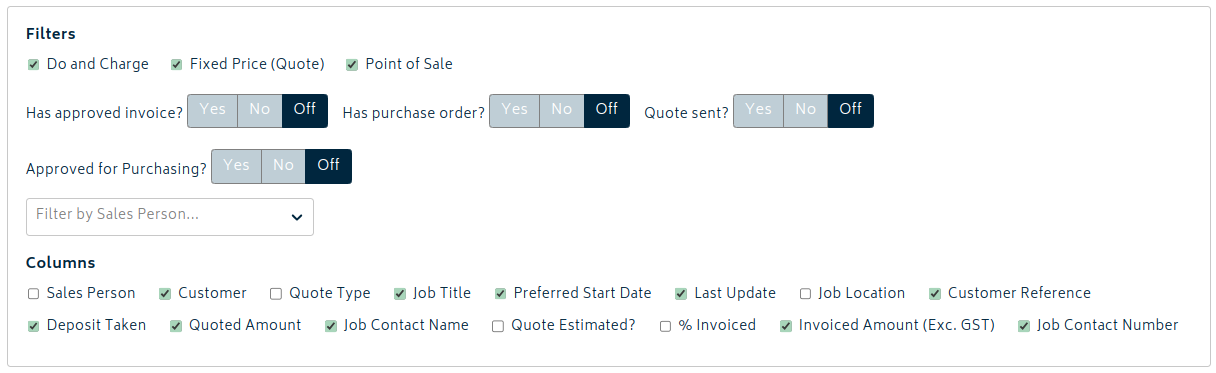
You can use them to filter jobs by type, quote status, invoice status, whether they are approved for purchasing, or whether they have an outstanding purchase order associated with them. You can also use the checkboxes to customize the display of information to your liking by showing and hiding columns.
Selecting a Job
Simply click on the row of a job to navigate to the job edit page for the job.
The Job Actions button can also be used as a quick navigation to go to the section of the job you’re interested in. See the next section for more details.
Job Schedule Page
The Job Schedule page allows you to see which jobs are currently ongoing and upcoming jobs at a glance. You can use this view to review some quick details regarding each job.

In order to view jobs on the schedule, they need to be set up with a Start Date and an End Date. Hovering over a job will give basic information on who the job is for and where it is to be.

Up to 4 jobs can be displayed per row. If you have more than 4 ongoing jobs at once, you can click the three dots at the bottom of the cell to view all jobs for that day. This will switch the view from month view to timeline view.

Clicking any job will give you options to edit the start and end times, as well as to view the job directly in the system.


